

Are you feeling overwhelmed by the clutter in your life? If so, then it’s time to embark on a transformative journey towards minimalism. “Get Minimal in 30 Days: A Declutter Challenge” is a comprehensive program designed to help you simplify your surroundings and create a more peaceful and organized living space. By following this 30-day minimalism declutter challenge, you will learn practical strategies and techniques to remove excess belongings, declutter your mind, and ultimately achieve a lifestyle of simplicity and tranquility. Say goodbye to the chaos and hello to a clutter-free existence.

This image is property of modernminimalism.com.
Table of Contents
Week 1: Evaluating Your Belongings
Day 1: Setting Goals
Setting goals is an important first step in any journey, including your decluttering journey. Take some time to sit down and think about what you hope to achieve by decluttering your belongings. Are you looking to create a more organized and tidy living space? Do you want to simplify your life and have less stuff to take care of? Are you hoping to reduce stress and create a more peaceful home environment? Whatever your goals may be, write them down and keep them in mind as you go through this declutter challenge.
Day 2: Assessing Your Living Space
Before you can begin decluttering, it’s essential to assess your living space and get a clear picture of what areas need the most attention. Take a tour of your home and make note of any areas that are particularly cluttered or disorganized. This could be your bedroom, closet, kitchen, or any other space that could benefit from some decluttering. By identifying these trouble spots, you can prioritize your decluttering efforts and tackle the areas that need the most attention first.
Day 3: Identifying Your Clutter
Clutter can come in many forms, and it’s essential to identify what clutter looks like for you personally. It could be stacks of paper, clothes you no longer wear, old magazines, or excess kitchen gadgets. Take some time to walk through your home and identify the specific items that contribute to your clutter. By understanding what clutter looks like for you, it will be easier to make decisions about what to keep and what to let go of as you declutter.
Day 4: Categorizing Your Belongings
To make the decluttering process more manageable, it’s helpful to categorize your belongings into different groups. This could include categories like clothing, books, kitchen items, sentimental items, and so on. Categorizing your belongings will not only help you see the bigger picture of what you own but also make it easier to tackle one category at a time during the decluttering process. Remember to keep a list or spreadsheet to track your progress and mark off each category as you complete it.
Day 5: Creating a Timeline
Decluttering can feel overwhelming, especially if you have a lot of belongings to go through. To stay motivated and ensure you are making steady progress, create a timeline for your declutter challenge. Break down the areas or categories you want to tackle into manageable tasks and assign each task to a specific day or week. By having a timeline in place, you can hold yourself accountable and make steady progress towards your decluttering goals.
Day 6: Establishing Sorting Criteria
As you go through your belongings, it’s crucial to establish sorting criteria to help you make decisions about what to keep and what to let go of. A common method is to sort items into three categories: keep, donate/sell, and trash. Consider the usefulness, sentimental value, and frequency of use when making these decisions. Ask yourself if the item serves a purpose in your life, if it brings you joy, or if it adds value. Having clear sorting criteria will make the decision-making process easier and more efficient.
Day 7: Starting with Small Wins
To build momentum and gain confidence in your decluttering journey, start with small wins. Begin decluttering in an area or category that you find relatively easy to tackle. It could be a small drawer, a section of your closet, or a single kitchen cabinet. By starting small, you can experience immediate progress, and it will motivate you to continue decluttering other areas. Celebrate each small win and use it as fuel to keep going in the weeks ahead.
Week 2: Decluttering Room by Room
Day 8: Decluttering the Bedroom
Your bedroom should be a peaceful and relaxing sanctuary, free of clutter and chaos. Start decluttering your bedroom by removing any items that don’t belong in this space. Put away any dishes, books, or electronics that have made their way into your bedroom. Then, tackle your clothes. Sort through your wardrobe and get rid of any items that no longer fit, are damaged, or that you simply no longer wear. Consider donating gently used clothing to those in need.
Day 9: Organizing Your Closet
Your closet is an excellent place to continue your decluttering efforts. Start by taking everything out of your closet and giving it a thorough clean. As you put things back, consider using organizing tools such as hangers, bins, or shelves to maximize space and keep things tidy. Sort your clothing by category (shirts, pants, dresses, etc.) to make it easier to find what you’re looking for. Consider implementing a system like the “hanger flip” method to help identify clothes you rarely wear.
Day 10: Streamlining Your Dresser
Next, turn your attention to your dresser. Empty each drawer and assess the contents. Are there any items that are no longer needed or that you no longer love? Consider folding your clothes using the KonMari method to maximize space and create a visually pleasing arrangement. Use dividers or small bins to separate items like socks and underwear. Remember to only keep items in your dresser that you actually use and love.
Day 11: Simplifying your Nightstand
Your nightstand is often a clutter hot-spot, accumulating various items such as books, chargers, lotions, and more. Take some time to clean off your nightstand and only keep essential items within reach. Consider using a small tray or organizer to corral items like your phone, glasses, and a book or magazine you are currently reading. Keeping your nightstand minimalistic will create a sense of calm and make it easier to relax and unwind in your bedroom.
Day 12: Tidying Up Your Bathroom
The bathroom is another space that can quickly become cluttered. Start by clearing out any old or expired toiletries, makeup, or medications. Dispose of any empty containers or items you no longer use. Consider implementing storage solutions such as bins or drawer dividers to keep your bathroom essentials organized. Keep only the items you regularly use and arrange them neatly to create a clean and functional space.
Day 13: Sorting Through Your Kitchen
The kitchen is often a hub of activity and can accumulate a significant amount of clutter over time. Begin by removing any items from your kitchen counters that you don’t use daily. Assess your utensils and appliances and consider donating any duplicates or items that you rarely use. Go through your pantry and discard expired food items. Consider organizing your kitchen items by function, such as grouping baking supplies or spices together, to make them easier to find and use.
Day 14: Clearing out the Pantry
On the last day of Week 2, focus on decluttering and organizing your pantry. Start by taking everything out so you can see what you have. Discard any expired or stale food items. Consider using transparent containers or bins to group like items together, making it easier to see what you have and prevent future clutter. Donate any non-perishable food items that you don’t plan on using or that you have an excess of. Having a well-organized pantry will make meal prep and grocery shopping much more efficient.
Continue reading…

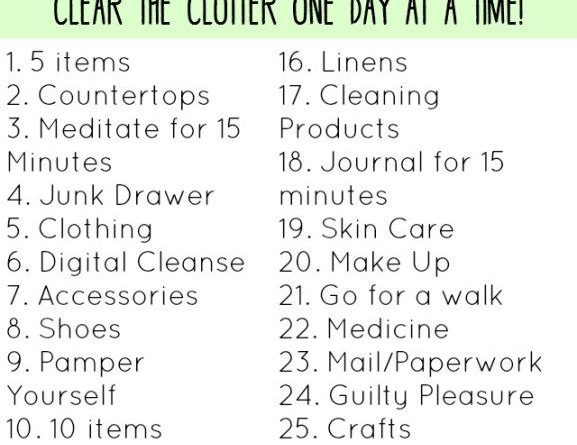
This image is property of i.pinimg.com.