Ready to transform your sewing space into a clutter-free oasis? In this article, you’ll discover simple yet effective strategies to declutter and organize your sewing area, allowing you to fully enjoy your creative pursuits. From practical storage solutions to clever organization tips, you’ll learn how to create a space that inspires and enhances your sewing projects. Say goodbye to the chaos and hello to a tidy and inviting workspace that will leave you feeling motivated and productive. Get ready to unleash your inner sewing guru as we tackle the task of decluttering and organizing your sewing space!
Table of Contents
Assess the Current State of Your Sewing Space
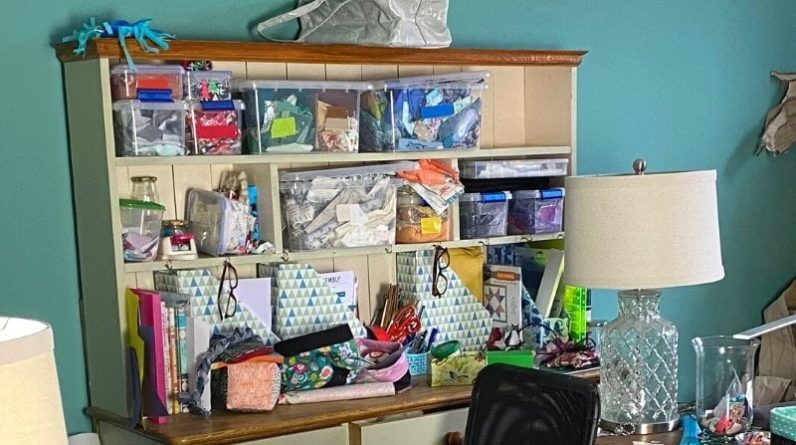
Your sewing space is the creative haven where you bring your ideas to life. But a cluttered sewing space can hinder your creativity and productivity. So, take a moment to evaluate the current state of your sewing space. Look around and assess the clutter. Is there fabric piled up on the floor? Are your tools scattered everywhere? Identifying these cluttered areas is the first step towards creating an organized sewing space that will inspire and motivate you.
Evaluate the Clutter
Now it’s time to dive deeper and evaluate the clutter in your sewing space. Start by examining each corner, shelf, or surface in your sewing area. Take note of any items that are out of place or no longer serve a purpose. It’s essential to be honest with yourself during this evaluation. If you come across items that you haven’t used in ages or that no longer spark joy, it might be time to let them go.
Identify Areas that Need Organization
Next, identify the areas in your sewing space that are in desperate need of organization. Perhaps your fabric stash is overflowing and needs better storage options, or maybe your sewing tools are scattered and hard to find. By pinpointing these specific areas, you can create a decluttering plan tailored to your unique needs, ensuring an organized and efficient sewing environment.
Consider Your Storage Options
When it comes to organizing your sewing space, storage is key. Consider the various storage options available to you and select the ones that best suit your needs. Invest in storage containers and bins that can neatly hold your fabrics, notions, and tools. Vertical storage solutions like shelves or pegboards can maximize your space and make items easily accessible. Remember to keep in mind your personal preferences and the size of your sewing space when choosing storage options.
Create a Decluttering Plan
Now that you have assessed the current state of your sewing space and identified areas that need organization, it’s time to create a decluttering plan. A well-thought-out plan will help you stay focused and motivated throughout the process.

Set Specific Goals
Start by setting specific decluttering goals. Decide what you want to achieve with your sewing space organization. It could be to create a more spacious and efficient workspace or to have a visually appealing sewing area. By setting clear goals, you can prioritize your efforts and stay on track.
Establish a Timeline
Next, establish a timeline for your decluttering project. Consider how much time you can dedicate to organizing your sewing space each day or week. Breaking down the task into smaller, manageable chunks will help prevent you from feeling overwhelmed. Set deadlines for specific areas or tasks to ensure you make steady progress towards your goal.
Gather Necessary Organizing Supplies
Before you embark on your decluttering journey, gather all the necessary organizing supplies. This might include storage containers, bins, drawer dividers, labels, and any other tools that will aid in organizing your sewing space. Having these supplies readily available will prevent unnecessary interruptions during the decluttering process.
Sort and Declutter
With your decluttering plan in place and your supplies at the ready, it’s time to start sorting and decluttering your sewing space. Take it one area or category at a time to prevent becoming overwhelmed.
Start with One Area or Category at a Time
To maintain focus and avoid getting sidetracked, start by decluttering one area or category at a time. You could begin with your fabric stash, sorting it by type, color, or even project. Or if your sewing tools are the primary source of clutter, tackle that area first. By addressing one section at a time, you can better assess what needs to be kept, donated/sold, or discarded.

Sort Items into Keep, Donate/Sell, and Discard Piles
As you sort through your sewing supplies, create three distinct piles: keep, donate/sell, and discard. Be honest with yourself about the items you truly need and use regularly. Items that are no longer functional or serve a purpose should be discarded. Consider donating or selling items that are gathering dust but could be useful to others.
Be Ruthless and Avoid Hanging onto Unnecessary Items
When decluttering your sewing space, it’s crucial to be ruthless. Avoid the temptation to hold onto items with the belief that you might use them someday. If you haven’t used an item in months or years, it’s likely time to let it go. Be mindful of the space limitations in your sewing area and keep only the items that truly bring you joy or serve a practical purpose.
Maximize Storage Space
Once you have decluttered your sewing space, it’s time to maximize your storage space effectively. Efficient storage solutions will not only keep your sewing area organized but also make it easier to find and access your supplies when you need them.
Invest in Storage Containers and Bins
Investing in good-quality storage containers and bins is essential for an organized sewing space. Choose containers and bins that are sturdy, stackable, and easy to label. Clear bins allow for better visibility, making it simpler to locate specific fabrics or notions without having to go through each container.
Utilize Vertical Storage Solutions
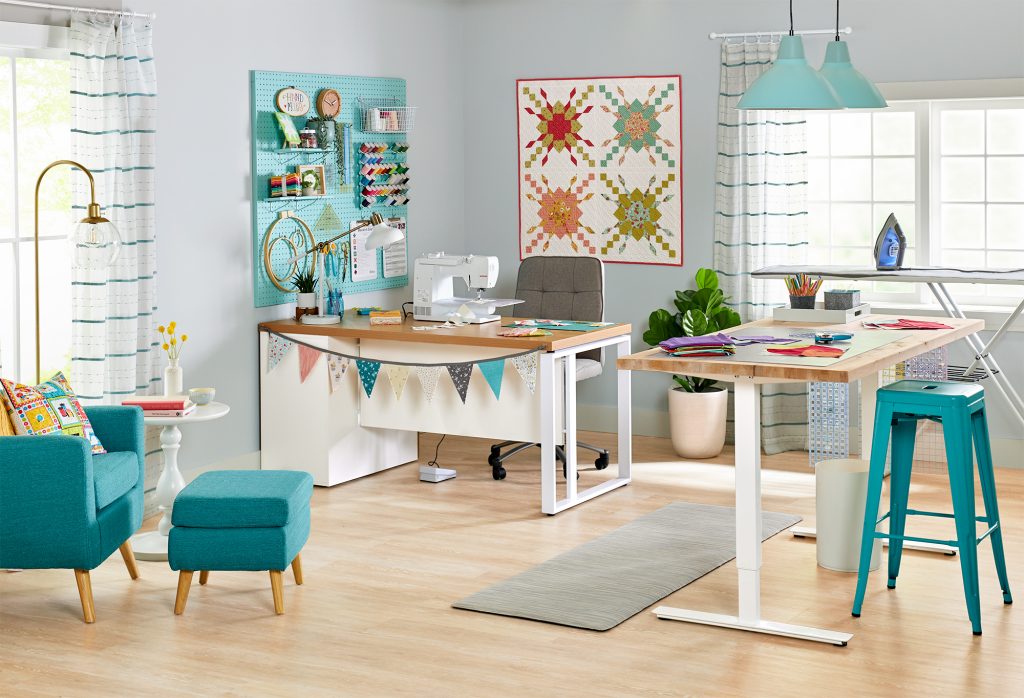
When space is limited, going vertical is the way to go. Install shelves or utilize pegboards and hooks to maximize your storage options. Vertical storage solutions not only save space but also serve as a display for your colorful notions or decorative items. This way, you can add a touch of creativity to your sewing space while keeping it organized.
Organize Items Based on Frequency of Use and Accessibility
To create an efficient workflow in your sewing space, organize your items based on their frequency of use and accessibility. Keep the tools and supplies you use most often within easy reach, while less frequently used items can be stored in containers or on higher shelves. This arrangement will streamline your creative process and save you time searching for specific items.
Arrange Sewing Tools and Equipment
Now that you have decluttered and maximized your storage space, it’s time to arrange your sewing tools and equipment in an organized and accessible manner.
Designate Specific Areas for Each Tool Category
Designate specific areas or zones for each tool category in your sewing space. For example, have a designated area for your cutting tools, sewing machine accessories, and measuring tools. This way, you can easily find what you need without rummaging through various drawers or containers.
Use Drawer Dividers or Inserts to Keep Items Organized
To prevent your tools from becoming a jumbled mess, use drawer dividers or inserts to keep items organized within each designated area. This will help maintain order and prevent tools from getting damaged or lost amidst the chaos. Divide your drawers into compartments suitable for different-sized tools and accessories.
Label Storage Containers to Easily Identify Contents
Labels are your best friend when it comes to maintaining an organized sewing space. Label your storage containers and bins to easily identify their contents. This will save you valuable time and prevent frustration when searching for specific fabrics or notions. Invest in a label maker or use adhesive labels for a clean and professional look.

Organize Fabrics and Notions
Fabrics and notions are the lifeblood of a sewing space, so it’s crucial to keep them well-organized and easily accessible.
Sort Fabrics by Type, Color, or Project
Sort your fabrics based on type, color, or even ongoing projects. This makes it easier to find the perfect fabric for your next sewing endeavor. Arrange your fabrics in a way that suits your personal preferences and makes them visually appealing. Consider investing in fabric organizers or utilizing bookshelves to display your fabric stash.
Consider Using Clear Bins or Shelves for Visibility
Clear bins or shelves are a great option for storing fabrics, as they allow for easy visibility. Being able to see your fabric choices at a glance helps you make quicker decisions during the creative process. Clear bins or shelves also prevent fabrics from getting wrinkled or forgotten at the bottom of a pile.
Utilize Small Compartments or Jars for Storing Notions
Small notions like buttons, zippers, and threads often end up scattered around our sewing spaces. Utilize small compartments or jars to store and organize these small items. This way, you can easily find the perfect button or matching thread without wasting time searching through various containers.
Establish a Cutting and Sewing Station
A designated cutting and sewing station is essential for efficient and enjoyable sewing experiences. Setting up this station properly will elevate your sewing space organization to the next level.

Set Up a Dedicated Surface for Cutting Fabrics
Ensure you have a dedicated surface for cutting fabrics, ideally at a comfortable height. This could be a large cutting mat on a table or even a foldable cutting table. Having a designated cutting area prevents damage to other surfaces in your sewing space and provides a clear and spacious place for your fabric preparations.
Ensure Proper Lighting and Ergonomic Setup
Good lighting is vital for accurate cutting and sewing. Ensure you have adequate lighting in your cutting and sewing station to prevent eye strain and mistakes. Additionally, create an ergonomic setup that supports good posture while sewing. Invest in a comfortable chair and position your sewing machine at a height that allows you to sew without straining your neck or back.
Keep Essential Tools and Supplies Within Reach
When setting up your cutting and sewing station, keep your essential tools and supplies within easy reach. This includes items like scissors, rulers, pins, and marking tools. Having everything at arm’s length will save you time and make the sewing process more seamless.
Create a System for Patterns and Templates
Patterns and templates are valuable resources in any sewing space. Creating a systematic approach to organizing them will keep your sewing projects on track.
Organize Patterns Based on Project Type or Size
Sort your patterns based on project type or size. This could mean grouping together patterns for clothing, accessories, or home decor. Alternatively, categorize patterns based on their complexity or level of experience required. Choose an organization system that works best for you and makes it easy to locate the perfect pattern for your next project.
Use Binders or Folders to Store and Categorize Patterns
Consider using binders or folders to store and categorize your patterns. This keeps them organized, prevents them from getting damaged, and allows for easy reference. Use dividers to separate different categories or types of patterns and label each section accordingly. This way, your pattern collection will be easily navigable.
Consider Scanning and Digitizing Paper Patterns for Easier Access
To further streamline your pattern organization, consider scanning and digitizing your paper patterns. This not only saves physical storage space but also allows you to access your patterns digitally from your computer or tablet. Use file management software or apps to keep your digital patterns organized and easily searchable.
Maintain an Orderly Sewing Space
After you have decluttered, organized, and set up your sewing space, it’s essential to maintain its tidy state. A few simple habits will go a long way in ensuring your sewing area remains orderly.
Put Items Back in Their Designated Places After Each Use
Make it a habit to put items back in their designated places after each use. Avoid the temptation to leave tools lying around or toss fabric scraps on the floor. This small act of tidying up will prevent clutter from accumulating and maintain the organization you worked so hard to achieve.
Clean and Tidy Up Regularly
Set aside time regularly to clean and tidy up your sewing space. Dust surfaces, vacuum or sweep the floor, and wipe down your sewing machine and other equipment. Not only does this keep your sewing area clean, but it also helps prolong the lifespan of your tools and prevents dust and debris from affecting your sewing projects.
Regularly Reassess and Declutter as Needed
As time goes by, it’s natural for our sewing spaces to accumulate new items or for our needs to change. Regularly reassess your sewing space and declutter as needed. If you notice clutter building up again or find items that no longer serve a purpose, let them go. By regularly reviewing and decluttering, you can ensure your sewing space remains functional and organized in the long run.
Inspiring Sewing Space Organization Ideas
Looking for some inspiration to take your sewing space organization to the next level? Here are a few creative ideas to consider:
Utilize Pegboards and Hooks for Tool Storage
Pegboards and hooks are versatile storage solutions that can add a touch of creativity to your sewing space. Hang your scissors, rulers, or even spools of thread on hooks attached to a pegboard. This not only keeps your tools organized but also turns them into a decorative feature.
Create a Color-Coded System for Fabrics
If you’re someone who loves color coordination, why not create a color-coded system for your fabrics? Arrange your fabrics based on color and create a visually stunning display. Not only will this make finding the right fabric easier, but it will also add a vibrant and artistic touch to your sewing space.
Repurpose Household Items for Inventive Storage Solutions
When it comes to organizing your sewing space, don’t be afraid to think outside the box. Repurposing household items can lead to inventive and cost-effective storage solutions. For example, use mason jars to store small notions, repurpose shoe organizers to hold fabric scraps, or use an old bookshelf as a stylish fabric display. Get creative and maximize your storage options without breaking the bank.
By following these steps and implementing these organization ideas, you can transform your sewing space into a functional, efficient, and inspiring haven. Happy sewing!


